Did you know that Windows sometimes marks files as hidden to prevent you from modifying or deleting important information? Likewise, you can also hide folders from prying eyes or simply reduce clutter.
Showing hidden folders is just as simple as hiding them. Keep reading to find out how to uncover hidden folders in Windows and what to do when hidden folders fail to reveal themselves.
How to show hidden files or folders on a Windows 10 computer
1. Press the Windows icon at the bottom-left of your screen. and search for the This PC application. Click it to open it.
2. You'll be greeted with a listing of all your computer's drives. Open the one that has the files you're looking for. In most cases, "C:" will be the one you need.
3. Once you're on the next page, at the top of the window there should be a toolbar with a button that says "View." Click on that.
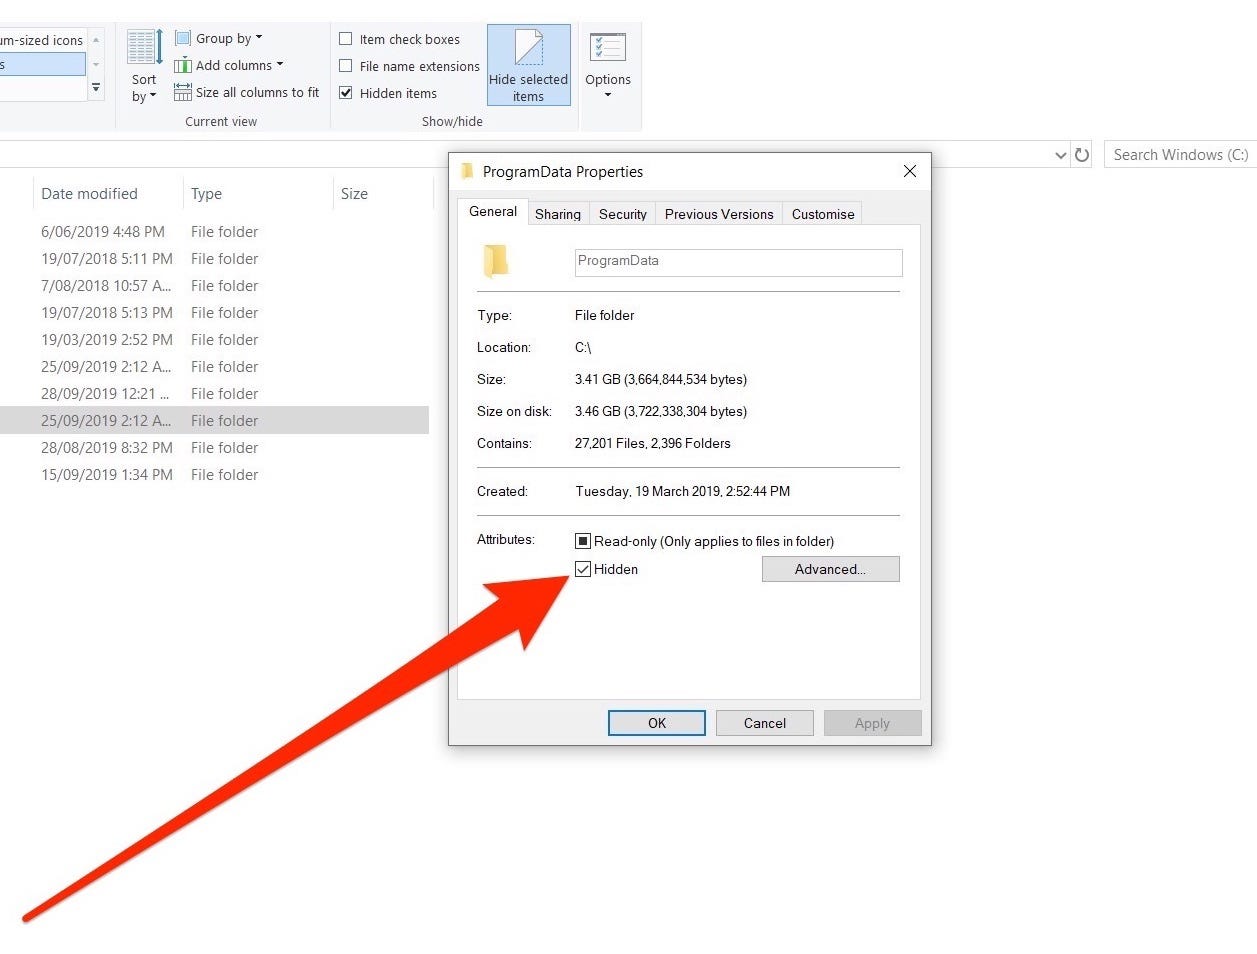
4. Find the checkbox called "Hidden Items." Click it so that a checkbox appears.
5. As long as Hidden Items remains checked, you'll be able to view any hidden file or folder.You can tell that a file or folder was marked as hidden by its icon, which will be slightly transparent.
You can also mark a file or folder as hidden, which is a good way to keep your files private. Here's how:
How to make a hidden file or folder on a Windows 10 computer
1. Find the file or folder you want to hide.
2. Right-click it, and select "Properties."
4. Click "OK" at the bottom of the window.


