
Google Chrome shows different types of errors when connecting to the requested site. We have explained many errors like resolving host, Aw! Snap and err_internet_disconnected. In this article let us discuss how to fix ERR_CONNECTION_RESET error in Google Chrome.
What is ERR_CONNECTION_RESET?
Browsers like Chrome act as a bridge between your computer and the web server to fetch the requested webpage. During this connection process, there are many errors possible like ERR_CONNECTION_RESET. This error is an indication that something interrupted and reset the connection when Chrome tries to load the webpage. You will see the error on the screen like below:

Generally just refreshing the webpage, restarting the Chrome or restarting the computer will resolve the issue and reload the page successfully again. If not then continue read the article for fixing the issue.
1. Check Internet Connection
When the err_connection_reset message is shown on the Chrome, first thing you should check is your internet connection. If you are using cables ensure the network cables are not disturbed. If you use WiFi, the connection might be fluctuating due to various problems. Check out the article on fixing WiFi problems in Windows 10.
Remember the wireless icon shown on the task bar does not mean the computer can be connected to internet. Simple way to check internet connection is to check with another device connected to the same network.
If the connection issue is not resolved then try restarting your computer and see the page can be loaded.
2. VPN Connection Issue
The most probable reason for err_connection_reset is the fluctuation of connection due to change in network or IP settings. If you are using VPN then ensure that the VPN has stable connection and not blocking the internet.
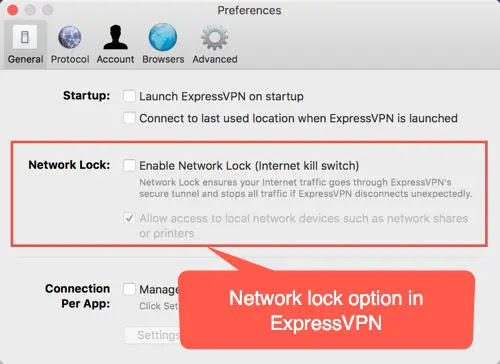
Most of the popular VPN apps has an option for network lock. This option will block the internet connection when VPN connection is dropped. It may result in err_connection_reset error when VPN is again connected to different server.
3. Check Firewall Settings
The next try is to check the firewall settings on your PC or Mac. On Windows 10, follow the below steps to disable firewall.
- Click “Windows Key + X” to open power user menu and go to Control Panel.
- Navigate to “System and Security” and go to “Windows Firewall”option.
- Click on the “Turn Windows Firewall on or off” option.
- Choose “Turn off Windows Firewall (not recommended)” option for each available network.

Follow the below steps in Mac to disable firewall:

- Click on the Apple icons located on the top left corner.
- Open the “System Preferences” option.
- Go to “Security & Privacy” option.
- Click on the “Turn Off Firewall” under “Firewall” tab.

4. Disable Antivirus or Real-time Protection
- Go to “Start” menu and then to “Settings” option.
- Navigate to “Update & Security” option.
- Disable “Real-time protection” under “Windows Defender” tab.

5. Check LAN Settings

Follow the below steps on Mac:
- Go to the Apple icon on top left corner and then go to “System Preferences… > Network” option.
- Choose the active connected Wi-Fi. Click on the lock icon showing “Click the lock to make changes”.
- Enter your administrator password to unlock network preferences.
- Then click on the “Advanced…” button and go to “Proxies” tab.
- Disable all proxy protocols and click on the OK button.

6. Reset TCP/IP Settings

On Windows 10, follow the below steps to reset network adapter, renew the IP address and flush DNS:
Enter the following commands in the command prompt
netsh winsock resetnetsh int ip resetipconfig /releaseipconfig /renewipconfig /flushdns
7. Clear Browsing History

8. Increase Maximum Transmission Unit (MTU) Size
- Press “Win + X” keys and then select “Command Prompt (Admin)” option.
- Type the command netsh interface ipv4 show subinterface and enter.
- You will see the list of networks. Note down the network for which you want to increase the MTU size. This should be the network of your active internet connection.
- Type netsh interface ipv4 set subinterface “LAN” mtu=1450 store=persistent and press enter. Remember to replace the LAN with the network from the list.